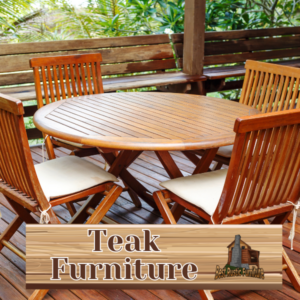
Restoring aged rustic furniture allows you to breathe new life into cherished pieces and preserve their historical and sentimental value. However, the restoration process requires careful assessment, cleaning, repairing, refinishing, and proper maintenance techniques to achieve the desired results. Here are some tips to help you navigate the journey of reviving old rustic furniture:
Assessing the Furniture:
- Determining the Level of Damage: Thoroughly examine the furniture to identify any structural issues, such as cracks, splits, or wobbly joints, as well as surface damage like scratches, dents, or watermarks.
- Identifying the Type of Wood and Finish: Understand the wood species and the original finish to guide your restoration choices and ensure compatibility between materials.
Cleaning and Prepping the Furniture:
- Removing Dust and Dirt Buildup: Start by gently dusting off the furniture’s surface and crevices. Use appropriate cleaning methods to avoid causing further damage.
- Addressing Stains and Discoloration: Treat any visible stains or discoloration using suitable cleaning agents or techniques, depending on the wood and finish.
Repairing and Restoring the Furniture:
- Fixing Loose Joints and Construction: Stabilize loose joints by applying wood glue, clamping, and reinforcing them with screws or nails, if needed. In intricate areas, seek professional assistance.
- Repairing Scratches and Dents: Utilize appropriate methods, such as wood fillers, sanding, and refinishing techniques, to repair minor blemishes and restore the furniture’s appearance.
- Replacing Missing or Damaged Hardware: Locate suitable replacements for any missing or broken hardware like knobs, handles, hinges, or clasps to restore both functionality and authenticity.
Refinishing and Rejuvenating the Furniture:
- Sanding and Stripping the Existing Finish: Remove the old finish by sanding or stripping techniques to reveal the natural wood. Follow proper safety measures and choose the appropriate method for your specific piece.
- Applying Stain, Paint, or Varnish: Enhance the beauty of the wood by applying a stain to enrich its color, paint for a new look, or varnish for protection and shine. Ensure compatibility between products and follow the application instructions.
Applying a Protective Finish:
- Preserve the restored furniture by applying a protective finish, such as wax, oil, or polyurethane, to safeguard against moisture, heat, and regular wear and tear.
Preserving and Maintaining the Restored Furniture:
- Regular Cleaning and Dusting: Develop a cleaning routine using a soft cloth and gentle cleaning solutions to maintain the furniture’s cleanliness and remove any accumulated dirt or dust.
- Preventing Future Damage and Wear: Implement preventive measures like using coasters, placing protective pads, and avoiding direct sunlight or extreme temperature variations to extend the lifespan of your restored rustic furniture.
By following these tips, you can successfully revive and cherish your aged rustic furniture, preserving its historical character and beauty for many more years to come.
Key takeaway:
- Assessing the furniture: Before starting the restoration process, it is essential to assess the level of damage and identify the type of wood and finish.
- Cleaning and prepping: Removing dust and dirt buildup is crucial before repairing and restoring the furniture. Additionally, addressing stains and discoloration will ensure a better end result.
- Repairing and refinishing: Fixing loose joints, repairing scratches, and replacing missing hardware are vital steps in restoring aged rustic furniture. Sanding, stripping, and applying the appropriate finish will rejuvenate its appearance.
Tips for Assessing the Furniture
Assessing the condition of aged rustic furniture is crucial before embarking on the restoration journey. By determining the level of damage and identifying the type of wood and finish, you can effectively plan the next steps. So, let’s dive into the tips for assessing your furniture and discover the secrets hidden beneath the wear and tear. Get ready to unlock the potential of these timeless pieces and bring them back to life!
Determining the Level of Damage
- Determining the level of damage is crucial when restoring aged rustic furniture. Here are steps you can take to assess the condition:
- Inspect the overall structure for any visible damage or weakness.
- Check for loose joints, broken legs, or missing hardware.
- Examine the wood surface for scratches, dents, or water rings.
- Assess the level of discoloration or stains on the furniture.
- Determine if the original finish is intact or needs to be stripped.
- Take note of any deep scratches or areas that require more extensive repairs.
By carefully evaluating these factors, you can determine the level of damage and plan your restoration process accordingly.
Identifying the Type of Wood and Finish
Identifying the type of wood and finish is essential when restoring aged rustic furniture. Here are some steps to assist you in the process:
- Examine the wood grain: Carefully observe the pattern and color of the wood grain to determine the type of wood used.
- Check for labels or marks: Certain furniture pieces may contain labels or marks indicating the type of wood or the manufacturer.
- Consider the age: Different eras favored various types of wood, so the age of the furniture can offer clues about the wood used.
- Assess the finish: Analyze the color, texture, and sheen of the finish to identify whether it is varnish, shellac, lacquer, or paint.
- Test with solvents: If uncertain about the finish, perform a solvent test on a small inconspicuous area using denatured alcohol or lacquer thinner to observe its reaction.
By correctly identifying the type of wood and finish, you can ensure that the restoration process is carried out accurately and the furniture is restored to its former glory.
In the late 1800s, rustic furniture gained popularity in America. Crafted from various types of wood, such as oak, pine, or cedar, each piece showcased unique characteristics. The finishes ranged from rich stains to hand-painted designs. Today, identifying the wood and finish allows us to preserve the original essence of these aged treasures and appreciate their history.
Cleaning and Prepping the Furniture
Reviving the old can be a gratifying experience, especially when it comes to restoring aged rustic furniture. In this section, we’ll take a deep dive into the crucial step of cleaning and prepping the furniture. We’ll unveil effective techniques to eliminate dust and dirt buildup, as well as strategies to tackle stubborn stains and discoloration. Get ready to learn valuable tips that will bring new life to your cherished rustic pieces!
Removing Dust and Dirt Buildup
- To effectively remove dust and dirt buildup from aged rustic furniture, start by using a soft-bristled dusting brush to gently brush away loose dirt and debris.
- For more stubborn dirt, use a toothbrush or a moist cloth dipped in a solution of mild soap and water to gently scrub the surface.
- If there are deep scratches or stains, use fine steel wool or sandpaper to carefully remove them, always working in the direction of the wood grain.
- Once the furniture is clean, wipe it down with a damp cloth to remove any soap residue, then dry it thoroughly.
- For a finishing touch, consider applying a thin coat of furniture wax using a lint-free cloth, following the instructions on the product label.
I recently restored an old dresser that had years of dust and dirt buildup. Following these steps, I was able to effectively remove the dust and dirt buildup, bringing back its original beauty and restoring it to its former glory. The removal of the dust and dirt buildup revealed the natural wood grain underneath, giving it a shiny finish that completely transformed the piece of furniture.
Addressing Stains and Discoloration
To effectively address stains and discoloration when restoring aged rustic furniture, follow these steps:
- Identify the types of stains: Determine whether they are water-based, oil-based, or ink stains.
- Clean the surface: Use a mixture of soap and water to gently cleanse the stained area with either a soft cloth or a toothbrush.
- Remove water rings: Combine equal parts of white vinegar and vegetable oil, then apply the mixture to the ring. Allow it to sit for a few hours before wiping it off.
- Treat ink stains: Take a cotton cloth moistened with rubbing alcohol and delicately blot the stain until it fades away.
- Sand and refinish: If the stains persist, lightly sand the affected area and apply a fresh finish to even out the color.
Remember to test any cleaning or treatment method on a small, inconspicuous area before applying it to the entire piece. By effectively addressing stains and discoloration, you can restore your aged furniture to its former glory.
Repairing and Restoring the Furniture
Looking to revive your aged rustic furniture? Let’s dive into the art of repairing and restoring your beloved pieces. From tackling loose joints to fixing scratches and dents, and even replacing missing hardware, this section will provide you with all the tips and tricks you need to bring your furniture back to its former glory. Get ready to give new life to your cherished pieces with these expert techniques.
Fixing Loose Joints and Construction
- To fix loose joints and construction in aged rustic furniture, follow these steps:
- Assess the extent of the problem by inspecting all joints and areas of construction.
- Disassemble the furniture if necessary to access the loose joints.
- Clean all surfaces and remove any old glue or debris.
- Apply wood glue to the joint and carefully reassemble the pieces, making sure they fit snugly together.
- Use clamps or straps to hold the joint firmly in place while fixing loose joints and construction.
- Allow the glue to dry completely before removing the clamps or straps.
- For added stability, consider reinforcing the joint with screws or brackets.
- Once the joint is secure, sand and refinish the area to blend it with the rest of the furniture.
This method of fixing loose joints and construction, known as “Fixing Loose Joints and Construction,” has been used by furniture restorers for centuries, allowing pieces of furniture to be brought back to their former glory. By applying their expertise and attention to detail, these artisans are able to repair broken legs, fix wobbly chairs, and restore antique furniture to its original condition. Through their skilled craftsmanship, these restorers bring new life to old dressers, ensuring that the history and beauty of these pieces are preserved for generations to come.
Repairing Scratches and Dents
- To repair scratches and dents on aged rustic furniture, follow these steps:
- Assessing the damage: To plan the appropriate repair method, determine the severity of the scratches and dents.
- Preparing the surface: Clean the furniture with a dusting brush, a moist cloth, and soap and water.
- Addressing deep scratches: Gently sand the scratch using fine steel wool, going along the grain. Clean the area once again.
- Repairing dents: For minor dents, lay a damp cloth over the dent and dampen it with water. Apply heat with an iron, and the steam will help raise the wood fibers. Sand and clean the area.
- Applying a finishing touch: Blend in the repaired area by matching the stain or paint of the furniture, and apply thin layers. Finish with a protective coating.
Imagine finding an old dresser in your grandparents’ attic. With deep scratches and dents, it had seen better days. After carefully repairing the scratches and dents, the dresser now proudly stands in your bedroom, bringing back memories of a different era.
Replacing Missing or Damaged Hardware
To replace missing or damaged hardware in aged rustic furniture, follow these steps:
- Assess the type of hardware needed, such as knobs, hinges, handles, or pulls, for replacing missing or damaged hardware.
- Remove any remaining hardware using appropriate tools, like a screwdriver or pliers, to prepare for the replacement.
- Measure the dimensions of the original hardware to ensure a proper fit for the replacement when replacing missing or damaged hardware.
- Visit hardware stores or online marketplaces to find matching or vintage-style hardware for replacing missing or damaged hardware.
- Install the new hardware using screws or other fasteners, following the original placement to replace missing or damaged hardware.
- Ensure it is securely attached by tightening the screws or fasteners properly while replacing missing or damaged hardware.
- Step back and admire the revived furniture with its new hardware, bringing it closer to its former glory, after replacing missing or damaged hardware.
Refinishing and Rejuvenating the Furniture
Give a new life to your old rustic furniture with our tips for refinishing and rejuvenating. From sanding and stripping the existing finish to applying stain, paint, or varnish, and finally adding a protective finish – we’ve got you covered. Get ready to witness the transformation of your worn-out furniture into a stunning piece that will enhance the charm of your space. So, roll up your sleeves, grab your tools, and let’s embark on this exciting furniture restoration journey together.
Sanding and Stripping the Existing Finish
To sand and strip the existing finish of aged rustic furniture, follow these steps:
- Begin by gathering the necessary tools: sandpaper (coarse, medium, and fine grit), paint stripper, paint scraper, and safety equipment.
- Start with sanding the surface using coarse-grit sandpaper to remove the top layer of the existing finish.
- Gradually switch to medium and then fine-grit sandpaper to smooth out the wood surface.
- For intricate details and hard-to-reach areas, use sanding blocks or small hand tools.
- If the furniture has multiple layers of paint or varnish, apply a paint stripper according to the manufacturer’s instructions.
- Use a paint scraper to gently remove the softened finish, working in the direction of the wood grain.
- After removing the finish, sand the surface again with fine-grit sandpaper to achieve a smooth and uniform appearance.
- Once you’re satisfied with the result, wipe down the furniture with a damp cloth to remove any dust or residue.
- Allow the furniture to dry completely before moving on to the next steps of refinishing or applying a new finish.
Sanding and stripping the existing finish is an essential step in restoring aged rustic furniture. By carefully removing the old layers, you can uncover the natural beauty of the wood and prepare it for a fresh finish. This process requires patience and attention to detail but is worth the effort to bring an old piece of furniture back to its former glory. Through sanding and stripping, you can revive the original condition of antique furniture, giving it a new life for generations to come.
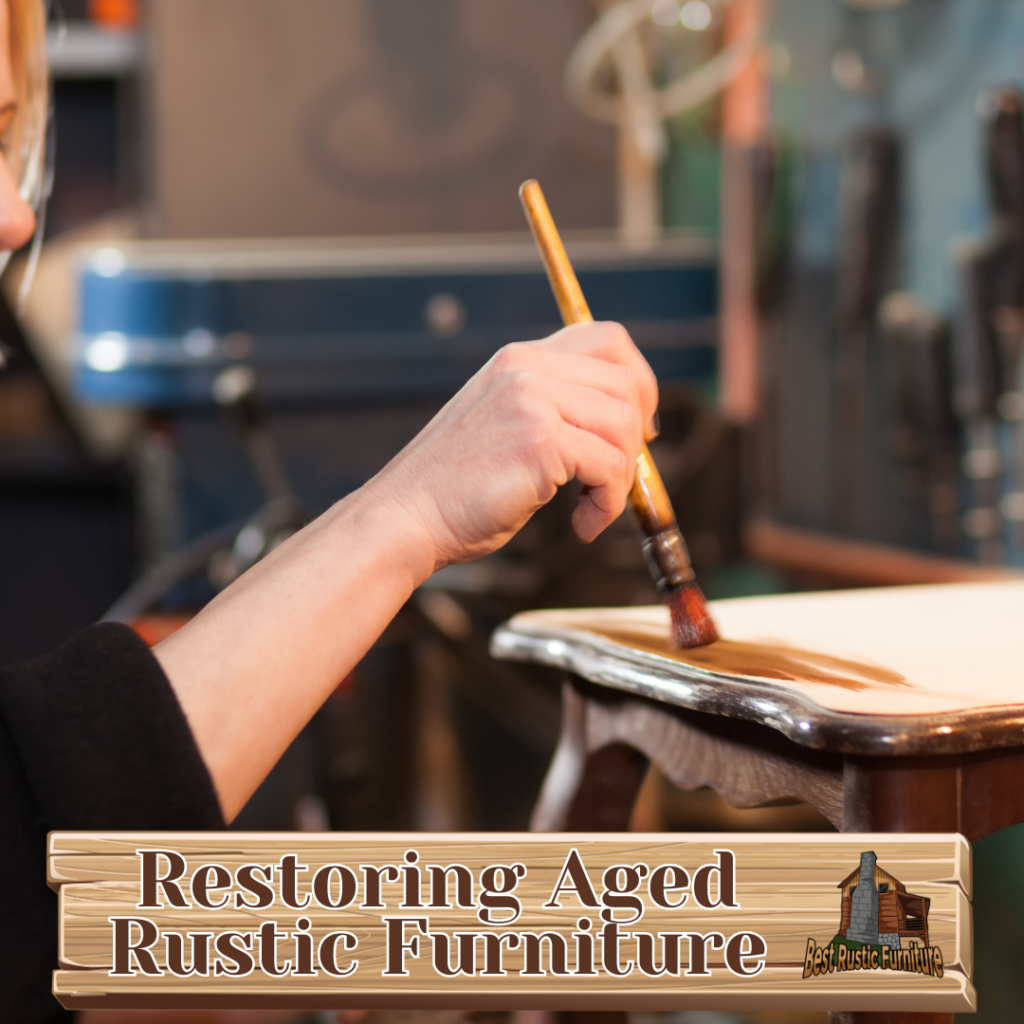
Applying Stain, Paint, or Varnish
Applying stain, paint, or varnish is an essential step in restoring aged rustic furniture. Here are the steps to follow:
- Prepare the surface by sanding it lightly to remove any roughness.
- Clean the surface thoroughly using soap and water, and let it dry completely.
- If using stain or varnish, apply it with a brush or rag in the direction of the wood grain.
- Wait for the stain or varnish to penetrate the wood, and wipe off any excess with a clean cloth.
- If using paint, apply thin coats with a brush, allowing each coat to dry before applying the next one.
- For varnish, apply it in thin, even coats with a brush, following the manufacturer’s instructions.
- Allow the stain, paint, or varnish to dry completely before applying additional layers if needed.
- After the final coat, gently buff the surface with a soft cloth to achieve a smooth and shiny finish.
True story: A friend of mine restored an old wooden dresser by applying a rich mahogany stain or varnish. The transformation was remarkable, bringing out the natural beauty of the wood and giving the piece a new life in her home.
Applying a Protective Finish
Applying a protective finish is essential when restoring aged rustic furniture to its former glory. This crucial step helps safeguard the wood surface from damage and wear. To successfully apply a protective finish, follow these steps:
| 1. Clean the furniture | Use a damp cloth and mild soap to effectively remove dirt and grime. |
| 2. Sand the surface | Utilize fine steel wool or sandpaper to create a smooth surface. |
| 3. Apply the finish | Take a lint-free cloth and apply thin applications of the protective finish in a circular motion. |
| 4. Let it dry and repeat | Allow the finish to completely dry between coats and repeat the process as needed for added protection. |
| 5. Buff the surface | Once the final coat is applied, use a clean cloth to buff up the finish, giving it a smooth and shiny appearance. |
Preserving and Maintaining the Restored Furniture
Preserving the beauty of restored rustic furniture is crucial to ensure its longevity and aesthetics. In this section, we’ll explore two essential aspects of maintaining the revamped furniture: regular cleaning and dusting, and preventing future damage and wear. Discover the secrets to keeping your cherished pieces in optimal condition, allowing them to stand the test of time while adding character and charm to your living space. Let’s dive in and unlock the key to preserving the allure of aged rustic furniture.
Regular Cleaning and Dusting
- Regularly clean and dust your aged rustic furniture to maintain its beauty and longevity.
- Use a dusting brush or a lint-free cloth to remove loose dust and debris.
- For deeper cleaning, lightly dampen a soft cloth with water and mild soap, then gently wipe the surface.
- When dealing with stubborn stains or built-up grime, employ a toothbrush or fine steel wool using a gentle circular motion.
- Ensure the furniture is thoroughly dried to prevent any potential moisture damage.
- To protect and restore the wood surface, finish off by applying a coat of finishing wax.
Following these regular cleaning and dusting practices will effectively preserve the original condition and beauty of your aged rustic furniture.
Preventing Future Damage and Wear
Preventing future damage and wear is crucial in maintaining the restored beauty of aged rustic furniture. Here are some steps you can take to help protect your furniture:
- To prevent scratches and marks on the floors, use furniture pads or felt protectors on the bottom of the furniture.
- For preventing fading and warping, avoid placing the furniture in direct sunlight.
- Avoid putting the furniture near heat sources like radiators or fireplaces as extreme temperatures can cause damage to the wood.
- Regularly clean and dust the furniture using a soft cloth or brush to remove dirt and debris.
- To prevent water damage and stains, never place wet or damp objects directly on the furniture.
- Create a barrier against wear and tear by applying a protective finish, such as furniture wax or varnish.
- Periodically inspect the furniture for any signs of damage or wear, and promptly address them to prevent further deterioration.
Pro-tip: To provide an extra layer of protection against spills and scratches, consider using coasters, placemats, and tablecloths. This will help preserve the beauty of your aged rustic furniture for years to come.
Some Facts About “Reviving the Old: Tips for Restoring Aged Rustic Furniture”:
- ✅ Furniture restoration is a popular activity for both professionals and hobbyists. (Source: HowStuffWorks)
- ✅ Restorers see potential in items that others may consider worthless. (Source: HowStuffWorks)
- ✅ The goal of furniture restoration is to bring an old piece of furniture as close as possible to its original condition. (Source: HowStuffWorks)
- ✅ Furniture restoration involves various tasks, including repairing broken parts, refinishing surfaces, and adding value to the item. (Source: HowStuffWorks)
- ✅ Howard’s Restor-A-Finish is a recommended product for restoring antique furniture without refinishing. (Source: Our Team)
Frequently Asked Questions
What are some tips for restoring aged rustic furniture?
Restoring aged rustic furniture can be a rewarding project. Here are some tips to help you revive your old pieces: – Clean the antique furniture with a soft cloth and soap and water. – Consider using a Liquid Sanding Deglosser to darken the shiny finish and give it a more rustic look. – Apply Howard’s Restor-A-Finish with fine steel wool to hide deep scratches and choose a stain that matches the piece’s color. – Work the Restor-A-Finish into the furniture, then dry and remove excess with a rag or paper towel. – Protect the finish and periodically clean it with Howard’s Feed and Wax.
How can I restore brass knobs and handles on antique furniture?
To restore brass knobs and handles, you can follow these steps: – Remove the hardware from the antique and clean it with soap and water. – Use an old toothbrush to scrub Howard’s Pine-Ola Copper and Brass Polish into the handle or knob. – Wipe off the polish and buff the hardware until it shines. – Clean with soap and water and dry thoroughly.
Can these restoration products add value to old furniture?
Absolutely! Proper restoration can enhance the value of old furniture. By restoring worn-out pieces, you can breathe new life into them and make them usable again. This adds value to both the functionality and the aesthetics of the piece.
Where can I find quality pieces of furniture for restoration?
You can find quality pieces of furniture for restoration in various places like antique stores, thrift shops, flea markets, and even online platforms like Facebook Marketplace. Keep an eye out for “diamonds in the rough” that may need some work but have great potential.
How can I achieve a wax finish on restored furniture?
To achieve a wax finish on restored furniture, follow these steps: – Once you have completed the restoration process, make sure the piece is clean and dry. – Apply a thin layer of Howard’s Feed and Wax using a lint-free cloth or a brush. – Work the wax into the surface following the wood grain. – Let it dry for a few minutes and then buff the piece with a clean lint-free cloth to achieve a beautiful waxed finish.
Can you provide a recap video of the restoration process?
Yes, the author of the blog post provides a recap video of the restoration process in their Instagram Stories. You can find the video in the blog post to visually see the steps they took to restore the antique furniture.